



Setting Up a Grow Tent: Step-by-Step
Setting Up a Grow Tent
A grow tent gives you a sealed, reflective, light‑tight box you can control completely — and most of them go up in under an hour. This guide walks through the build step by step, using a BAY6 XL Tent as the example. Other brands differ slightly, but the sequence is the same for almost every tent.
Before You Start
Two things are worth sorting before a single pole goes together.
Build it in the room it will live in
Give yourself plenty of space to manoeuvre — and don’t build a tent you then have to squeeze through a doorway. Assemble it in its final position.
Check your power and surroundings
You’ll need mains power for lights, fans, pumps and timers. For a one‑ or two‑light setup, aim for a couple of double wall sockets within easy reach. Use quality extension leads only where necessary and don’t overload the circuit — our guide to calculating your grow room’s energy draw will tell you what you’re pulling.
Lights and pumps often run at night and make a little noise, so set up away from bedrooms and main living areas.
Check the Contents

Before you start, empty the box and check you have everything:
- Horizontal poles
- Vertical poles
- 3‑way corner pieces
- Support bars
- Canvas
Step‑by‑Step Assembly
Step 1

Empty the box and check you have every part before you begin.
Step 2

Completely unfold and spread out the tent canvas.
Step 3

Use 4 corner pieces and 4 ‘number 1’ poles to make the base. Make sure the corners are snug and seated all the way.
Step 4

Take 4 ‘number 2’ poles and start assembling upright. Push them firmly into each corner.
Step 5

Insert the ‘number 3’ poles into the top of the ‘number 2’ poles, clicking them together securely.
Step 6

Use the 4 remaining corner pieces and 4 ‘number 1’ poles to construct the top. Check the corners lock properly.
Step 7

Attach the hooks to the remaining ‘number 1’ poles.
Step 8

Clip the support poles to the top of the frame. These will carry your light and carbon filter, so make sure they’re properly seated.
Step 9

Lift the canvas over the frame and pull it into position.
Step 10
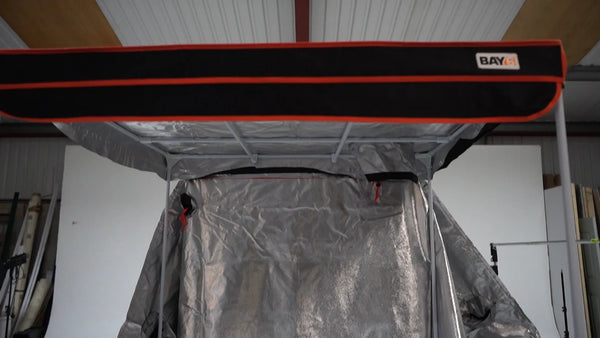
Zip up the sides to complete the assembly.
Tips & Tricks
- Don’t stand the tent on carpet. Carpet traps moisture from spills and leaks and can harbour bacteria. Fit an easy‑clean, reflective floor covering instead.
- Position for extraction. Think about where your ducting will run before you finalise the tent’s position — you want a short, straight route to a window, loft or chimney.
- Keep the support bars adjustable. You’ll be moving them when you hang your fan, filter and light.
What’s Next?
With the tent up, extraction is the next job — it’s the piece of kit that keeps temperature, humidity and odours under control.
- Grow Room Ventilation: Sizing & Installing an Extraction System
- Lighting Configuration: Ballasts, Reflectors, LEDs & Timers
This blog is part of our How to Grow Indoor Plants – Your Complete Guide series, designed to tell you everything you need to successfully grow indoors.


