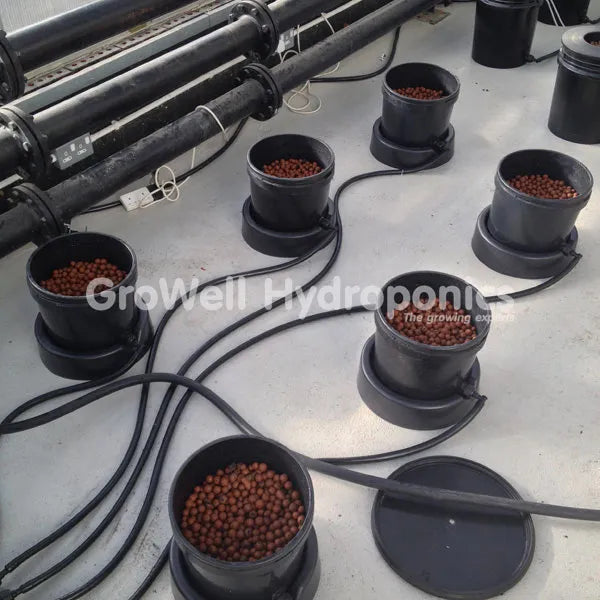
IWS Flood & Drain - How to Do it Right
Ready to flood roots with nutrients and oxygen? You've got to try Flood & Drain. But don't just dabble - if you're going to do it, do it right. Here's we show you how.
What's Flood & Drain?
It's a growing method that fills pots from the bottom up.
As the nutrient solution rises, old air and is pushed out of pots.
When your solution's drained away, fresh air is pulled in, enriching the rootzone with oxygen.
The more you flood, the more oxygen you trap.

Which growing media?
There's no right or wrong answer - it's up to you. BUT you do want a media or mix with a:
- Low / medium water holding capacity (WHC)
- High air-filled porosity (AFP)
In short, clay pebbles are your new best friend.
They're lightweight and there's lots of air space between clay pebbles, creating a high AFP.
The porous structure also absorbs and releases nutrient solution over time. This means you can flood often with very little risk of overdoing it. You know what that means - more oxygen.
You can use clay pebbles on their own, or mix them with another media
| Did you Know |
|---|
| A 10L pot of dry clay pebbles can absorb up to 5L of water! That's how porous they are! |
Lots of growers mix coco with clay pebbles to further increase the WHC. This gives them more time between floods and fewer floods each day.
If you do this:
- we recommend 25% coco to 75% clay
- 20% - 40% coco with 60 - 80% clay is OK
Mixes with 50% coco or more can stay wet for too long. This kind of defeats the point of flood and drain!

What's the ‘Flood Cycle’
Your flood cycle is made up of 3 things: flood frequency, height & duration.
You need to be very precise and accurate when setting your cycle.
Flood Frequency
This is how often you flood.
It really depends on the media being used and how well plants are established.
Flood Height
This is how high the water level rises in each pot.
Generally, you should always go for the maximum height
Flood Duration
This is how long each flood lasts.
It depends on the number of pots your systems has and your growing media.
Setting a Flood Height & Duration
Once you've put your system together, it's time to set your flood height and duration.
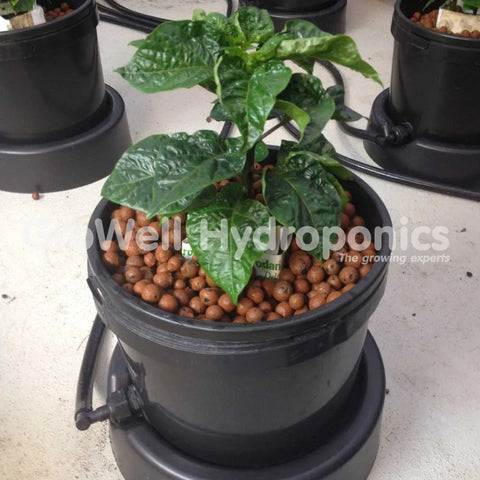
1. Fill pots
Insert the root control disk (copper side up) and add a 2 - 4"" layer of washed clay pebbles to the bottom of each pot.
Fill pots to 3/4 with your media or mix
2. Fill your tank

Ideally your nutrient strength should be 2 CF (0.2 EC) higher than it was in propagation.
Add a root stimulator for quick establishment, and adjust the pH to 5.5-6.5.
3. Start a Flood

Set your timer to minutes, and turn the dial all the way to the right for the longest possible flood time. Turn on the timer.
The brain and pots will start to fill.
4. Check your Water Level

Your aim is for the water level to reach the top of your media. You should be able to see the water level rising to the surface.
To check the media isn't floating up, push down on the media with the palm of your hand.
5. Add media if needed

If the water rises over the surface of the growing media, add more media.
6. Turn off and soak

When the brain stops filling and all the pots have the right amount of growing media and nutrient solution, leave them soaking in the nutrient solution for 30 minutes to 1 hour.
| Note |
|---|
| If you've got a slightly uneven floor, you'll find that the flood height may be slightly different in each pot. |
7. Start to drain

After the pre-soak, start the drain cycle on the timer by turning the dial to 'cancel feed' setting.
Once the drained, check the pH and CF in your tank and adjust if you need to.
If the pH or CF has changed dramatically, change the nutrient solution.
8. Time a Flood

Now you need to get a stopwatch.
Start the flood cycle and the stopwatch (you are timing how long it takes for ALL POTS to fill back to the maximum flood height.)
As soon as the maximum flood height is reached in all the pots, stop the stopwatch and start the drain cycle.
9. Set your timer

If using clay pebbles, add 1-2 minutes to the time recorded.
If using a coco mix, the time recorded is your actual flood time. You don't need to add extra time as it holds more water than pebbles.
You can see it took us just under 7 minutes to flood, so we set our flood time to 8 minutes.
| Note |
|---|
| Don't hold your flood for longer than 10 minutes. Leaving roots completely submerged for too long can cause poor root function and invite disease. |
Planting
Your pots should still be around three quarters full at this point.
1. Aim

You want young plants 2-3 cm from the max flood height.
Then, during a flood cycle, the flood height will reach the bottom of the propagation block.
2. Expose Roots

Pull back the wrapper to expose 2-3cm the block to expose roots. Then adjust some of the pebbles, plant the block into the pot and cover back the media. The raised wrapper will now sit at the same height as the flood height.
3. Add media

Once you are happy with the planting depth of all the plants, fill the rest of the pot with more prepared growing media.
| Note |
|---|
| If you place your young plants too deep into the pots your flood height will rise too high and saturate the propagation block causing poor initial root growth. |
Setting the Flood Frequency
How often you flood the pots is determined by:
- The growing media
- The plant size and water requirements
- The environmental conditions
The Growing Media
For growing media that does not retain much water, like clay pebbles, you need to flood the pots with a high frequency. When using clay pebble and coco mixes the WHC registers higher so flood frequency will be reduced.
CLAY PEBBLES
You can generally flood every 1-2 hours when the plant's growing vigorously.
Your exact frequency depends on:
- the size of your propagation blocks
- the size of your plants
- your grow room environment
A large plant in a small block that needed watering once a day in propagation - try flooding every 4 - 8 hours.
A small plant in a large cube that is not using much water - 1 or 2 floods per day will be enough.
When you see a big increase in veg growth, increase the frequency to once every 3-4 hours. As plants get bigger still, flood once every 2 hours.
A lot of growers leave this as their maximum flood frequency but some large plants in a hot and dry environment with a high water demand may benefit from a flood frequency of once an hour.
Remember that during each flood, oxygen is trapped around roots - more floods = more oxygen
COCO
The trick is not to over water.
During the first 1 - 2 weeks, flood no more than once a day, ideally in the middle of your light period.
Some growers actually hand water during this time, while plants are still establishing.
After the first 1 - 2 weeks, when serious vegging has started, plants need more water. Check the moisture level of your media before irrigating, towards the end of your light cycle. If it's drying, increase your frequency to twice a day. Both floods should be equally spaced.
Plants that have a really high water demand may need 3 floods a day. Your first irrigation should be at least 1-2 hours after the lights turn on.
Environment
Your nutrient strength flood frequency needs to reflect your environment.
When it's hot and dry, plants use more water and less nutrient - your nutrient strength should be lower and you need to flood once an hour.
In the same room that's cooler with a higher humidity, plants need less water and more nutrient. You want a higher nutrient strength and flood frequencies can be reduced to once every 2-3 hours.
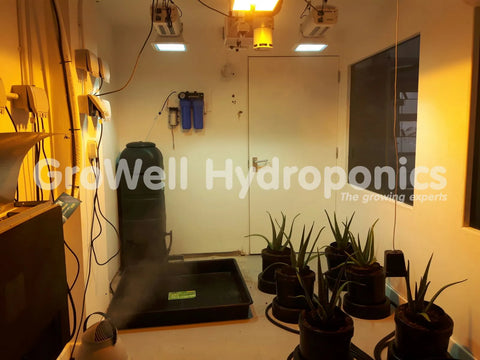
IWS Flood And Drain System Maintenance
Now your system's up and running, you need to keep it well maintained. Here are our top tips.
Avoid Root Blockages
Roots sometimes grow into pipes and block them.
To avoid this, always use the copper root control discs provided.
If you can, routinely turn the inner pot around 45° in the same direction every 2-3 days. This keeps roots away from the tube. Growth will be more even, too.
Checking For Root Blockages
Quickly pour 5-8 Litres of nutrient solution into the top of pots.
If the solution drains away freely, you’ve got nothing to worry about.
If the solution sits there and takes a long time to drain you most likely have a blockage.
| Note |
|---|
| Note - this technique only works well with clay pebbles. If your pot is blocked you should remove the inner pot and check the inlet/outlet tube for roots or debris. |
Keep Your System Clean
Make sure the float switches in the brain pot don't become dirty or clogged up with any growing media.
Each time you refill the reservoir, a quick rinse with fresh water over the switches will help prevent problems.
Over time some sediment and/or debris may collect in the reservoir or brain pot, remove or clean it immediately.